はじめに
研究で Blueninja を触っているのですが、しばらくさわらずにいるとすぐ忘れてしまうのでメモ。
というのも Blueninja は初心者には、正直扱いづらく慣れるまでとにかく大変です。
特に筆者のような電子工作をいままでしたことありません。組み込みアプリとかも触ったことありません。
という様な人にはハードルは高く、経験者以外お断り感があります。
ネットにも情報は多くないので、結構たいへんです。
Macに Blueninja の環境構築をする。
こちらのMacでBlueNinja開発環境の通りです。
Blueninjaのプロジェクトを作製する。
新規プロジェクトを作製します。
$ cd ~/Desktop/
$ app_create.sh firstproject
すると、実行した場所にプロジェクトが作成されます。
上の例だとDesktopにfirstprojectが出来ます。
blueninjaはプロジェクトをmakeして.binデータをBlueninjaに書き込むという流れで開発します。
一旦この状態で、blueninjaに書き込んでみます。
$ cd firstproject
$ make
...
...
... binary firstproject.elf firstproject.bin
$
プロジェクト直下にプロジェクト名.binが出来たら成功です。
Blueninja本体をPCにつなげると、DAPLINKというディスクがデスクトップに表れると思います。
ここに先ほどの、firstproject.binをコピーします。
この際、すこし時間がたってからコピーが始まり急に不正なディスクの取り出しを注意され、DAPLINKがまたマウントされるという一見失敗したかのような挙動をしますが、それで問題なくコピー出来ています。
そして、Blueninjaのパワースイッチの長押しして起動します。
しかし、まだなにも書いていないのでLEDがチカチカするだけで何も起こりません。
Blueninja の加速度をシリアル通信でprintfするだけのアプリを作る。
それではシリアル通信で、9軸加速度センサの値を取るアプリを作ります。
まず、必要なファイルをmakeで参照し使えるようにします。
1:CDP_TZ01B_BSP.mkのTZ01_motion_tracker.cとMPU-9250.cをコメントアウト。
2:TZ10xx_DFP.mkのSPI_TZ10xx.cをコメントアウト
blueninjaの開発はプロジェクトの中のsrc/main.cをいじるとこから始めます。このファイルは最初からあるので、必要な分追記していきます。
加速度・ジャイロセンサを取得するソースです。
/**
 * @file   main.c
 * @brief  Application main.
 *
 * @author Cerevo Inc.
 */

/*
Copyright 2015 Cerevo Inc.

Licensed under the Apache License, Version 2.0 (the "License");
you may not use this file except in compliance with the License.
You may obtain a copy of the License at

    https://www.apache.org/licenses/LICENSE-2.0

Unless required by applicable law or agreed to in writing, software
distributed under the License is distributed on an "AS IS" BASIS,
WITHOUT WARRANTIES OR CONDITIONS OF ANY KIND, either express or implied.
See the License for the specific language governing permissions and
limitations under the License.
*/
#include <stdio.h>
#include <string.h>
#include <stdbool.h>
#include <stdint.h>

#include "TZ01_system.h"
#include "TZ01_console.h"

// 5行追記
#include "TZ10xx.h"
#include "PMU_TZ10xx.h"
#include "GPIO_TZ10xx.h"
#include "SPI_TZ10xx.h"
#include "MPU-9250.h"

#include "utils.h"

extern TZ10XX_DRIVER_PMU  Driver_PMU;  // 追記
extern TZ10XX_DRIVER_SPI  Driver_SPI3; // 追記 9軸加速度センサ

int main(void)
{
    /* Initialize */
    TZ01_system_init();
    TZ01_console_init();

    // 3行追記
    if (MPU9250_drv_init(&Driver_SPI3)) {
        MPU9250_drv_start_maesure(MPU9250_BIT_ACCEL_FS_SEL_16G, MPU9250_BIT_GYRO_FS_SEL_2000DPS, MPU9250_BIT_DLPF_CFG_20HZ, MPU9250_BIT_A_DLPFCFG_20HZ);
    }
    for (;;) {
        if (TZ01_system_run() == RUNEVT_POWOFF) {
            /* Power off operation detected */
            break;
        }

        // 以下28行追記
        char buff[128];
        int16_t ax, ay, az;
        int16_t gx, gy, gz;
        int16_t mx, my, mz;
        MPU9250_accel_val acel;
        MPU9250_gyro_val  gyro;
        MPU9250_magnetometer_val magm;
        if (MPU9250_drv_read_accel(&acel)) {
            ax = (int16_t)acel.raw_x;
            ay = (int16_t)acel.raw_y;
            az = (int16_t)acel.raw_z;
        }
        if (MPU9250_drv_read_gyro(&gyro)) {
            gx = (int16_t)gyro.raw_x;
            gy = (int16_t)gyro.raw_y;
            gz = (int16_t)gyro.raw_z;
        }
        if (MPU9250_drv_read_magnetometer(&magm)) {
            mx = (int16_t)magm.raw_x;
            my = (int16_t)magm.raw_y;
            mz = (int16_t)magm.raw_z;
        }
        sprintf(buff, "acel %d %d %d ", ax, ay, az);
        TZ01_console_puts(buff);
        sprintf(buff, "gyro %d %d %d ", gx, gy, gz);
        TZ01_console_puts(buff);
        sprintf(buff, "magm %d %d %d \r\n", mx, my, mz);
        TZ01_console_puts(buff);
    }

    TZ01_console_puts("Program terminated.\r\n");
    return 0;
}
ソースの変更はこれだけです。makeします。
$ make
...
...
... binary firstproject.elf firstproject.bin
$
これをマウントしているDAPLINKにコピーします。
変な動きして、再びマウントされたら成功。
加速度をシリアル通信で表示
Macはscreenコマンドで、シリアル通信が行えます。
$ screen /dev/tty.usbmodem1432
他にusbでなにか接続詞ていなければ、tty.usbの段階でtabキーを押せばそのあとの番号をいちいち確認しなくても大丈夫です。
一応チェックする方法
$ ls /dev/tty.usb*
/dev/tty.usbmodem1432
これで、準備完了です。
パワースイッチを長押しして起動すれば、screenでどんどん加速度センサの値が表示されるはずです。
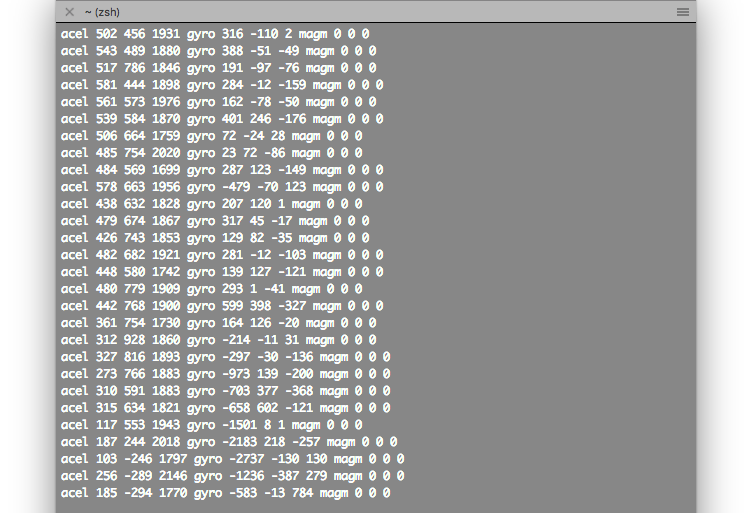
なぜか磁気センサの値をうまくとれていない。。。
今後余裕があったら、原因をさぐってまた書き直したいと思います。。。